CloudZip — Download & Installation Guide

A quick guide for first-time users. On the Mac, an app downloaded from outside the App Store may show a security prompt the first time you open it. Follow the steps below and it will run without any issue.


1. Download

Get the latest version (1.0.0) from the link below.

👉 [download link — CloudZip-1.0.0.dmg]

  • macOS 13 Ventura or later
  • Universal binary — runs natively on both Apple silicon (M1 and later) and Intel Macs


2. Install

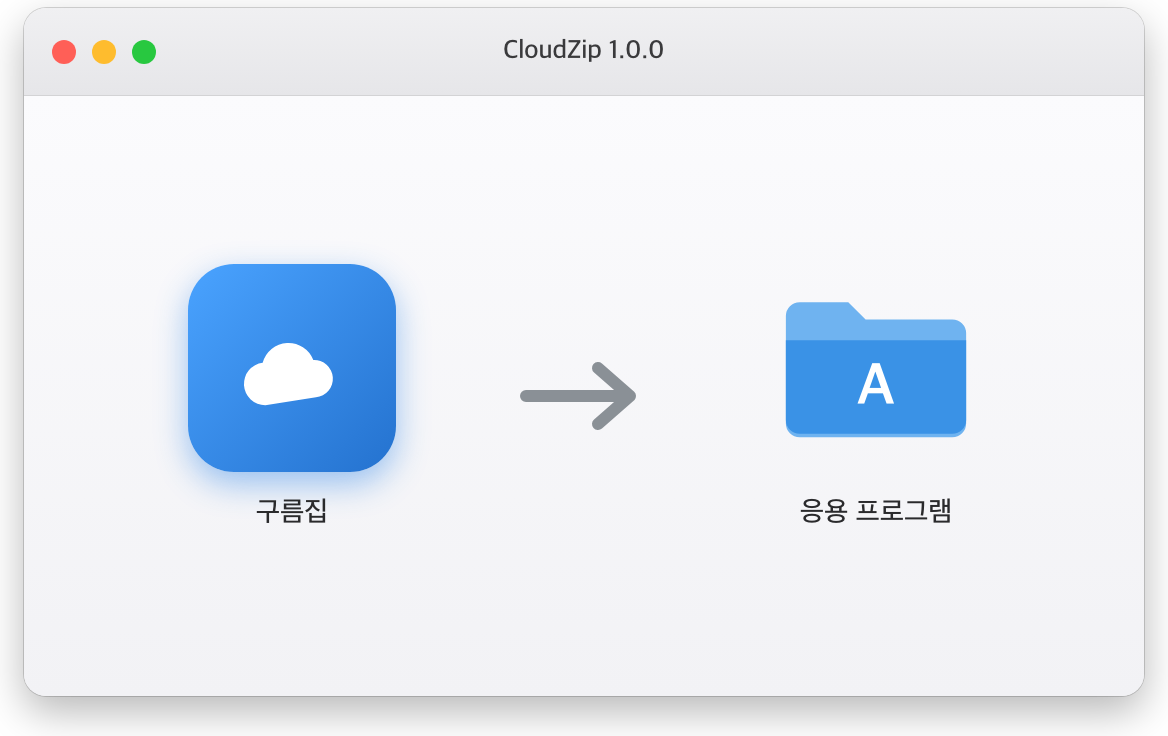
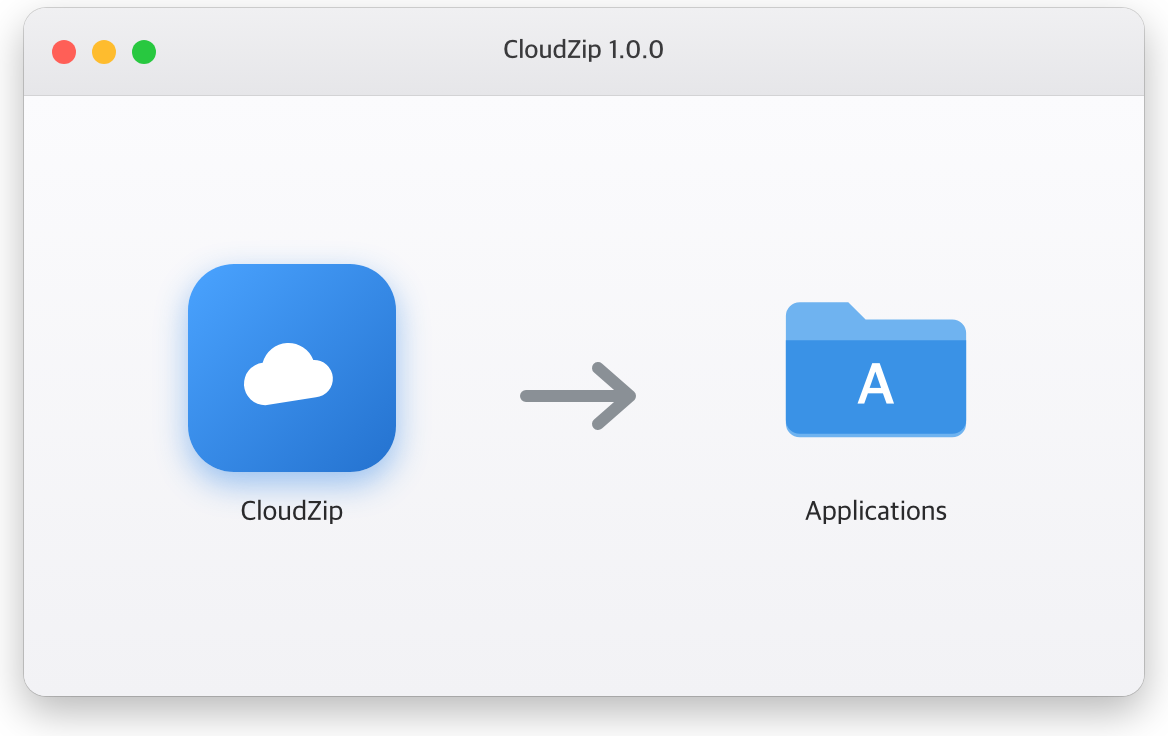
Double-click the downloaded .dmg, then drag the CloudZip icon into your Applications folder. That's it.
 

3. First Launch (clearing the security prompt)

CloudZip is distributed by an independent developer, so the first launch may show "unidentified developer" or "cannot be opened." This is expected — allow it once and it opens normally afterward.

▶ Option 1 — Open via right-click (macOS 14 and earlier)

  1. In Applications, right-click (or Control-click) the CloudZip icon
  2. Choose Open
  3. Click Open again in the dialog

▶ Option 2 — Allow in System Settings (macOS 15 Sequoia or later)

  1. Try launching CloudZip once (the prompt appears and closes)
  2. Open System Settings → Privacy & Security
  3. Scroll down and click Open Anyway next to the "CloudZip was blocked" notice
  4. Confirm with Open

▶ Option 3 — If it says "damaged and can't be opened" (Terminal)

Rarely you may see "CloudZip is damaged and can't be opened." This is due to the download quarantine attribute. Open Terminal (Applications → Utilities → Terminal), paste the command, and press

Enter

:

xattr -dr com.apple.quarantine /Applications/CloudZip.app

Then launch it again — it will open normally.


4. Enable the Finder Right-Click Menu

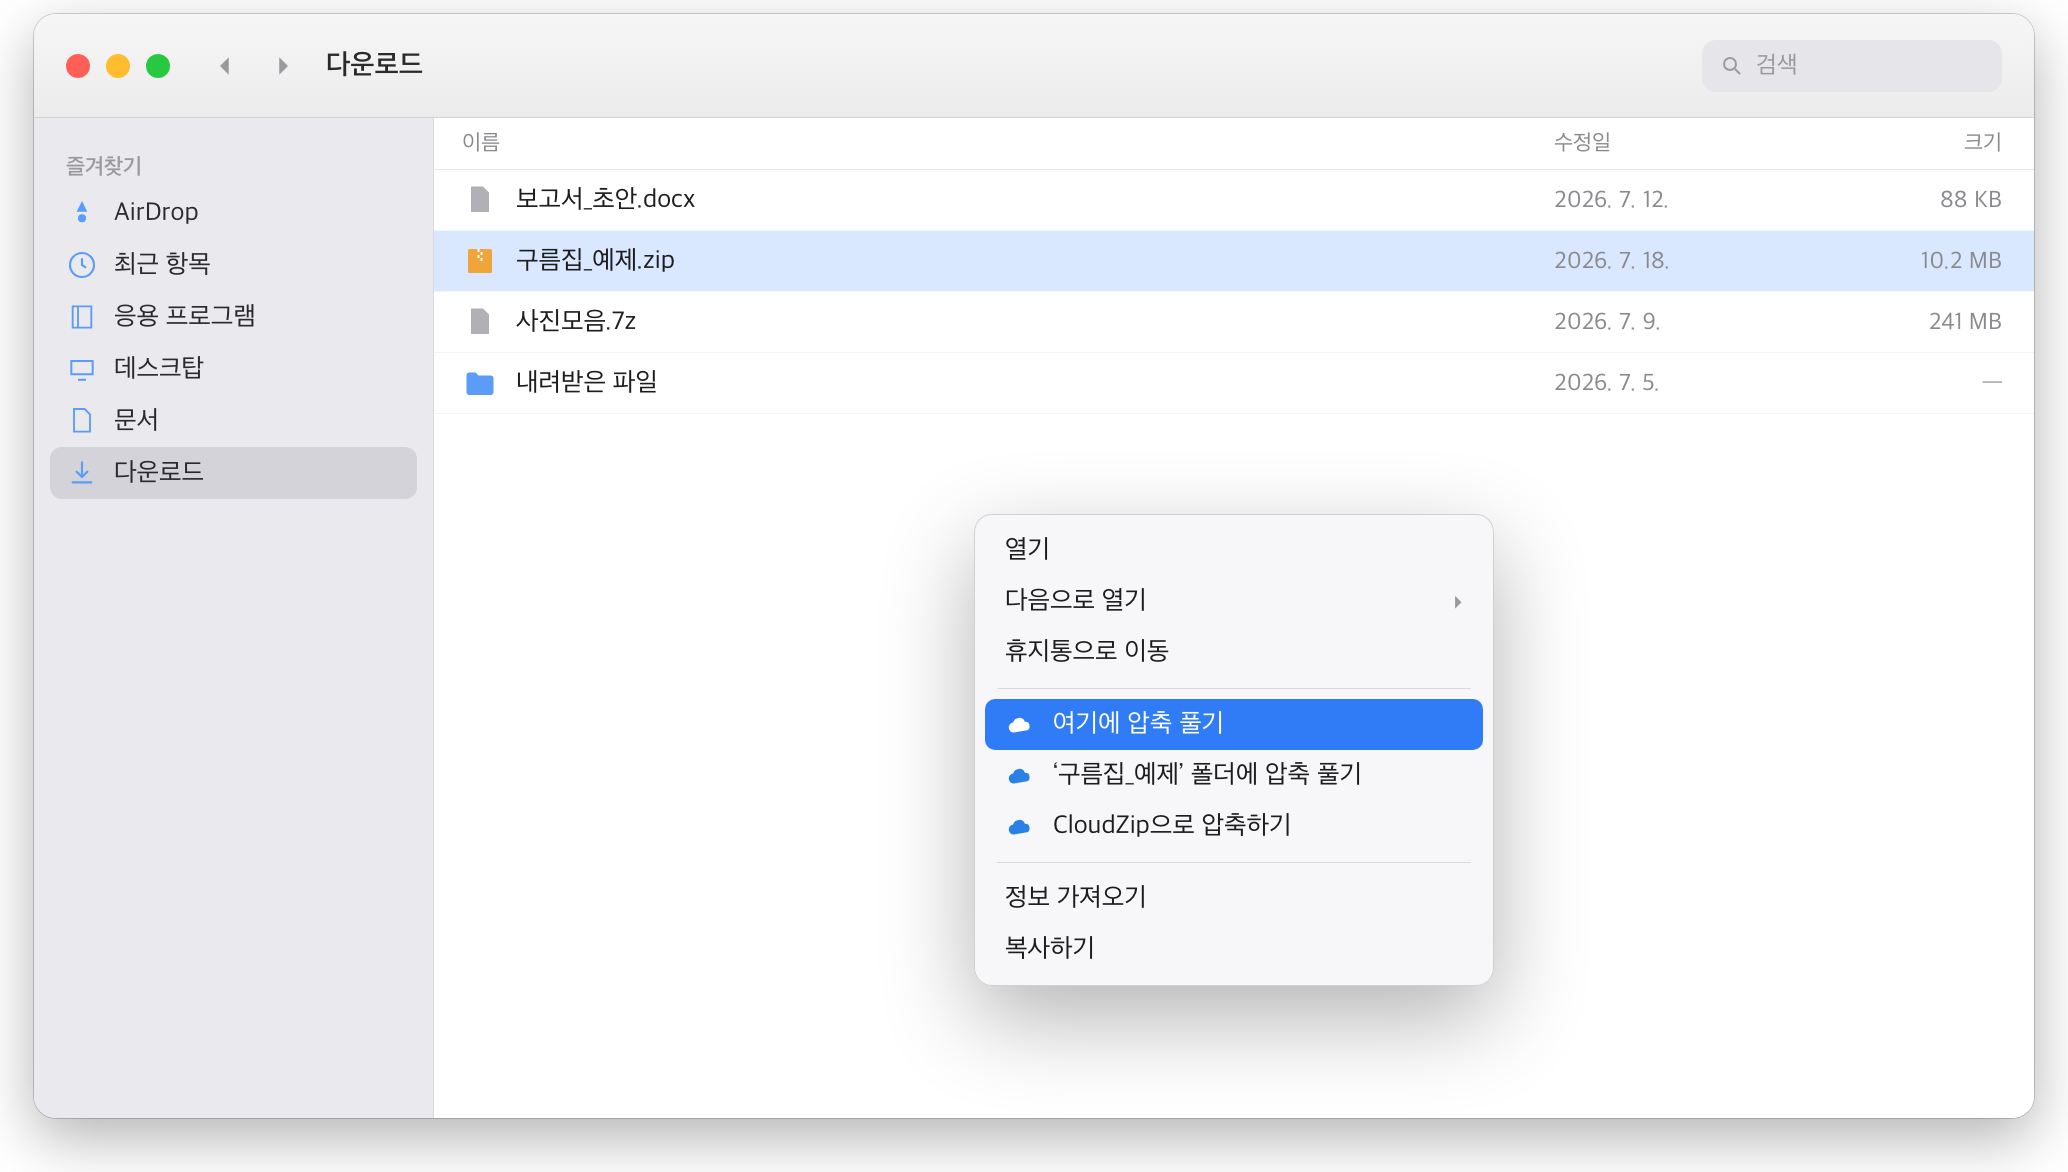
To use right-click → Compress / Extract in Finder, enable the extension once.

  1. Launch CloudZip once
  2. Open System Settings → General → Login Items & Extensions
  3. Under Finder extensions, turn on CloudZip

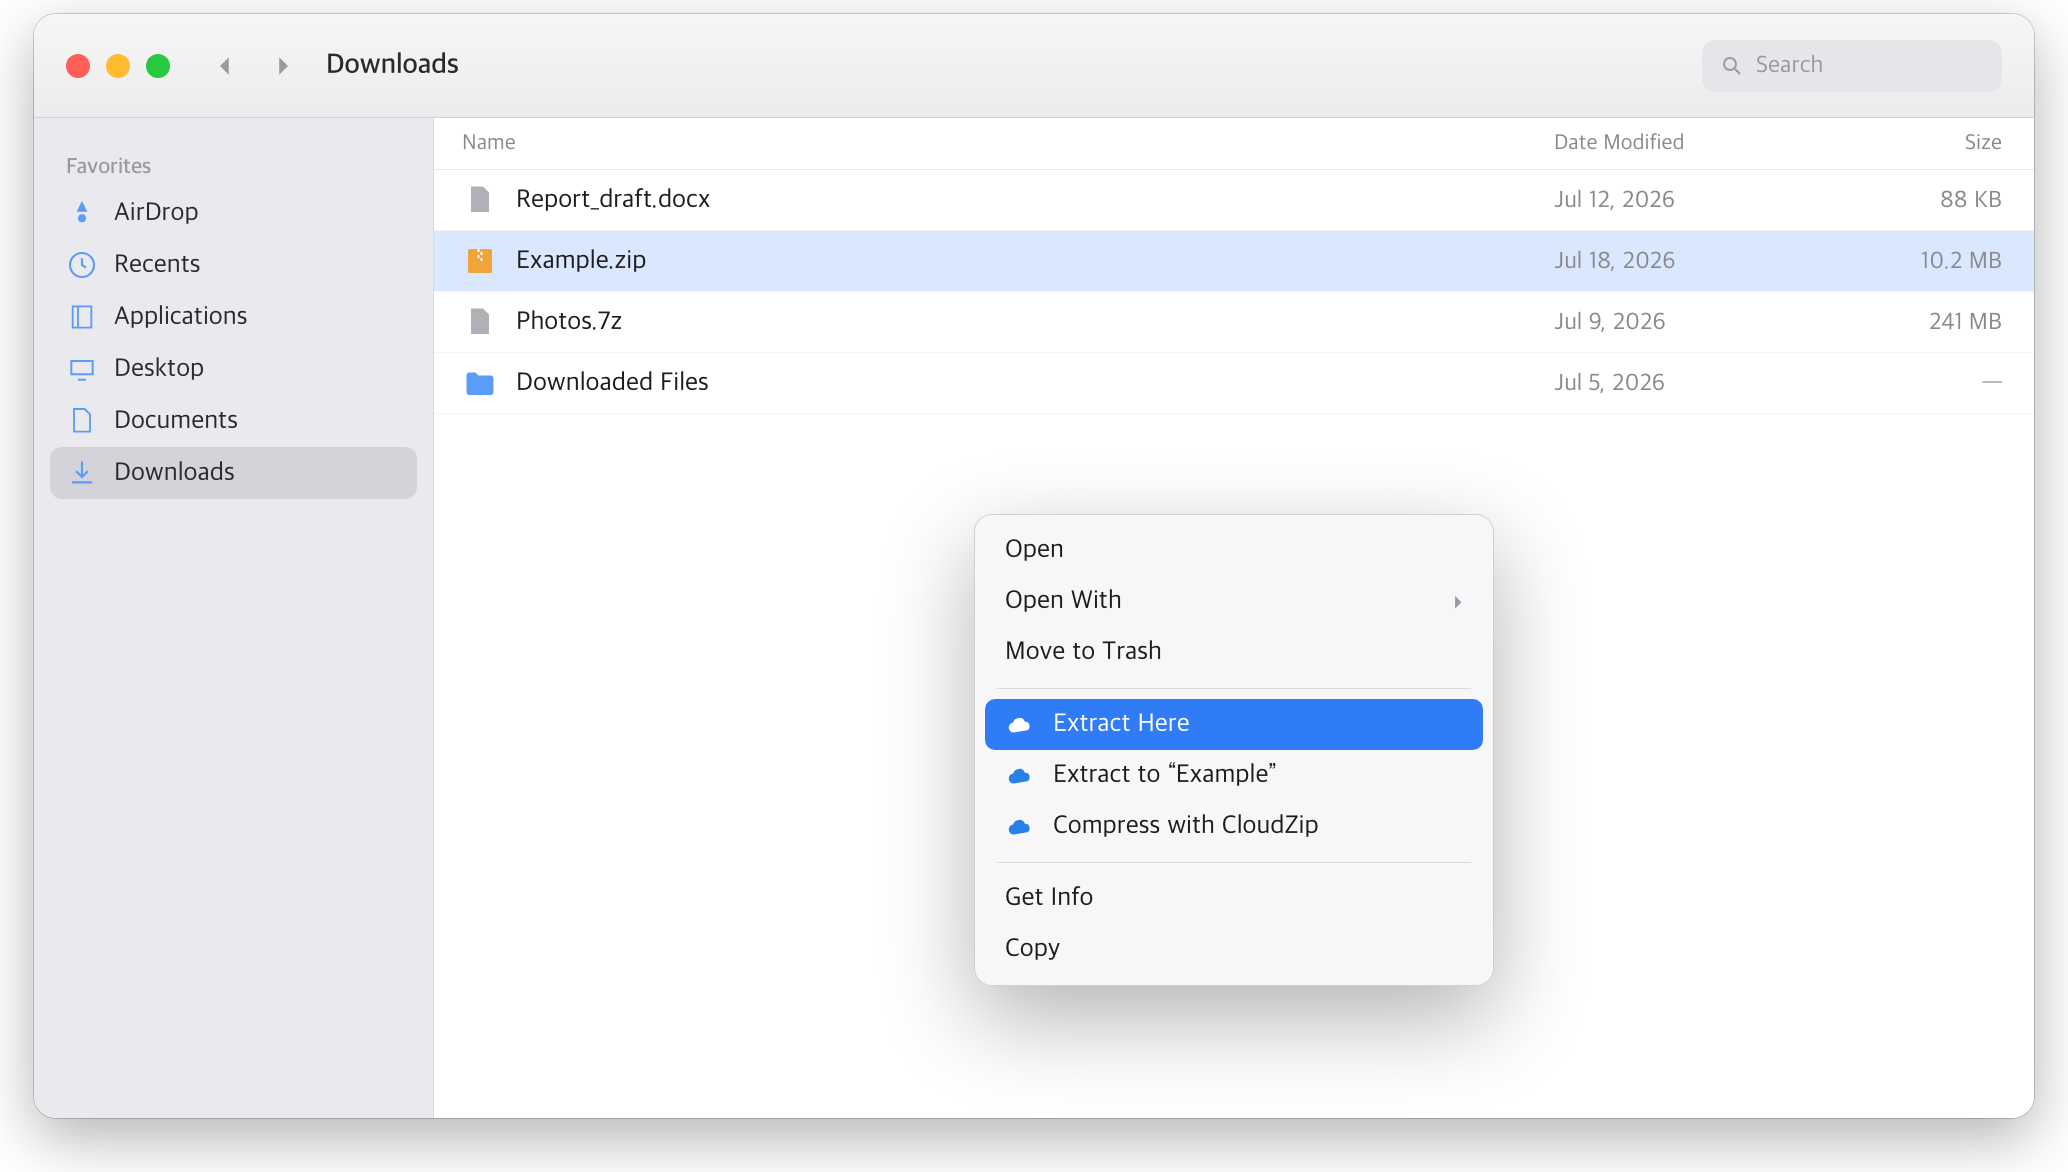
Right-clicking files or folders now shows Extract Here / Extract to "…" / Compress with CloudZip.


5. (Optional) Install the 'cloudzip' Terminal Command

To compress/extract from the terminal or scripts:

  1. Launch CloudZip
  2. Choose CloudZip → Install Command Line Tool… from the menu (enter your admin password once)

This creates a /usr/local/bin/cloudzip link so you can use it right away:

cloudzip -h                    # help
cloudzip l file.zip            # list
cloudzip x file.zip -o ./out   # extract
cloudzip c backup.zip folder -l 9   # compress


6. Updating

When a new version is out, download it the same way and replace the existing CloudZip in your Applications folder. (Quit the app first if it's running.)


반응형

CloudZip — A Lightweight, Native Archive Manager for Mac

⚙️ Requirements — macOS 13 Ventura or later · Universal (Apple silicon & Intel)

Handling archives on the Mac has always been a bit frustrating. The built-in tools garble non-Latin filenames, struggle with anything beyond ZIP, and offer almost no options. So I built an archive manager that is intuitive and designed for the Mac. It's called CloudZip.


ㅁ Supported Formats

Extract (open) — virtually every major format is supported.

  • Common: ZIP, ZIPX, 7Z, RAR, TAR, GZ (TGZ), BZ2 (TBZ), XZ (TXZ), LZ, LZMA, Z, ZST
  • Disk & installer: ISO, IMG, CAB, WIM, XAR, CPIO
  • Others: LHA/LZH, ARJ, SIT/SITX

Compress (create)

  • ZIP, 7Z, TAR, TAR.GZ, TAR.BZ2, TAR.XZ, TAR.ZST
  • ZIP also supports password protection (encrypted ZIP) and split archives


ㅁ Key Features

Fast, Powerful Compression

  • Multi-core parallel compression for high speed
  • Fast archiving — already-compressed files (photos, videos, PDFs, etc.) are stored without re-compression, saving significant time
  • Password (encrypted ZIP) and split archives (10MB / 100MB / 700MB / 1GB / 4GB)


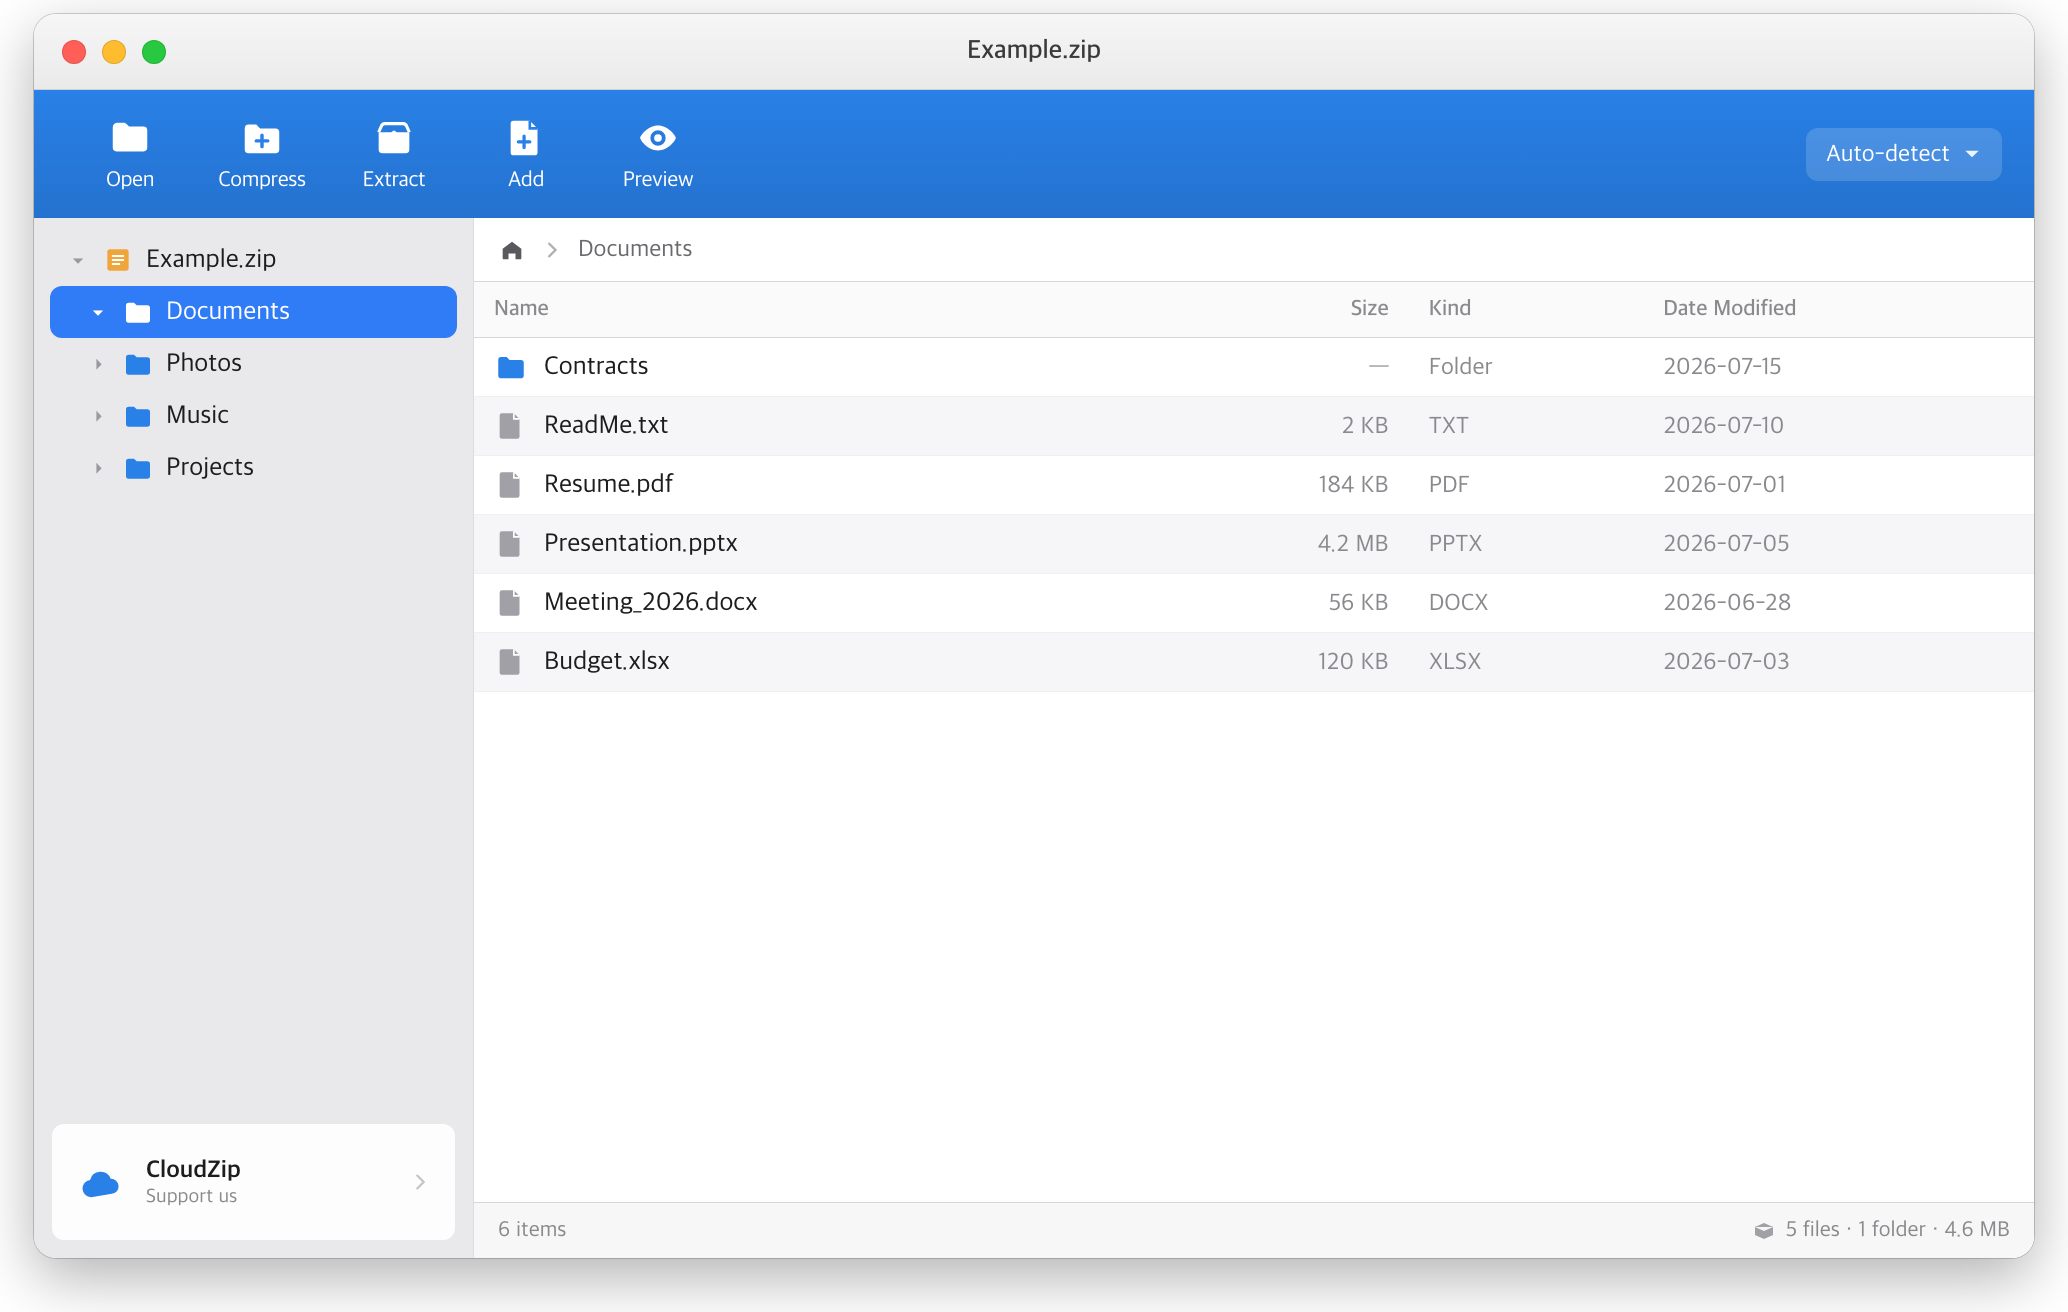
Edit ZIP Without Extracting

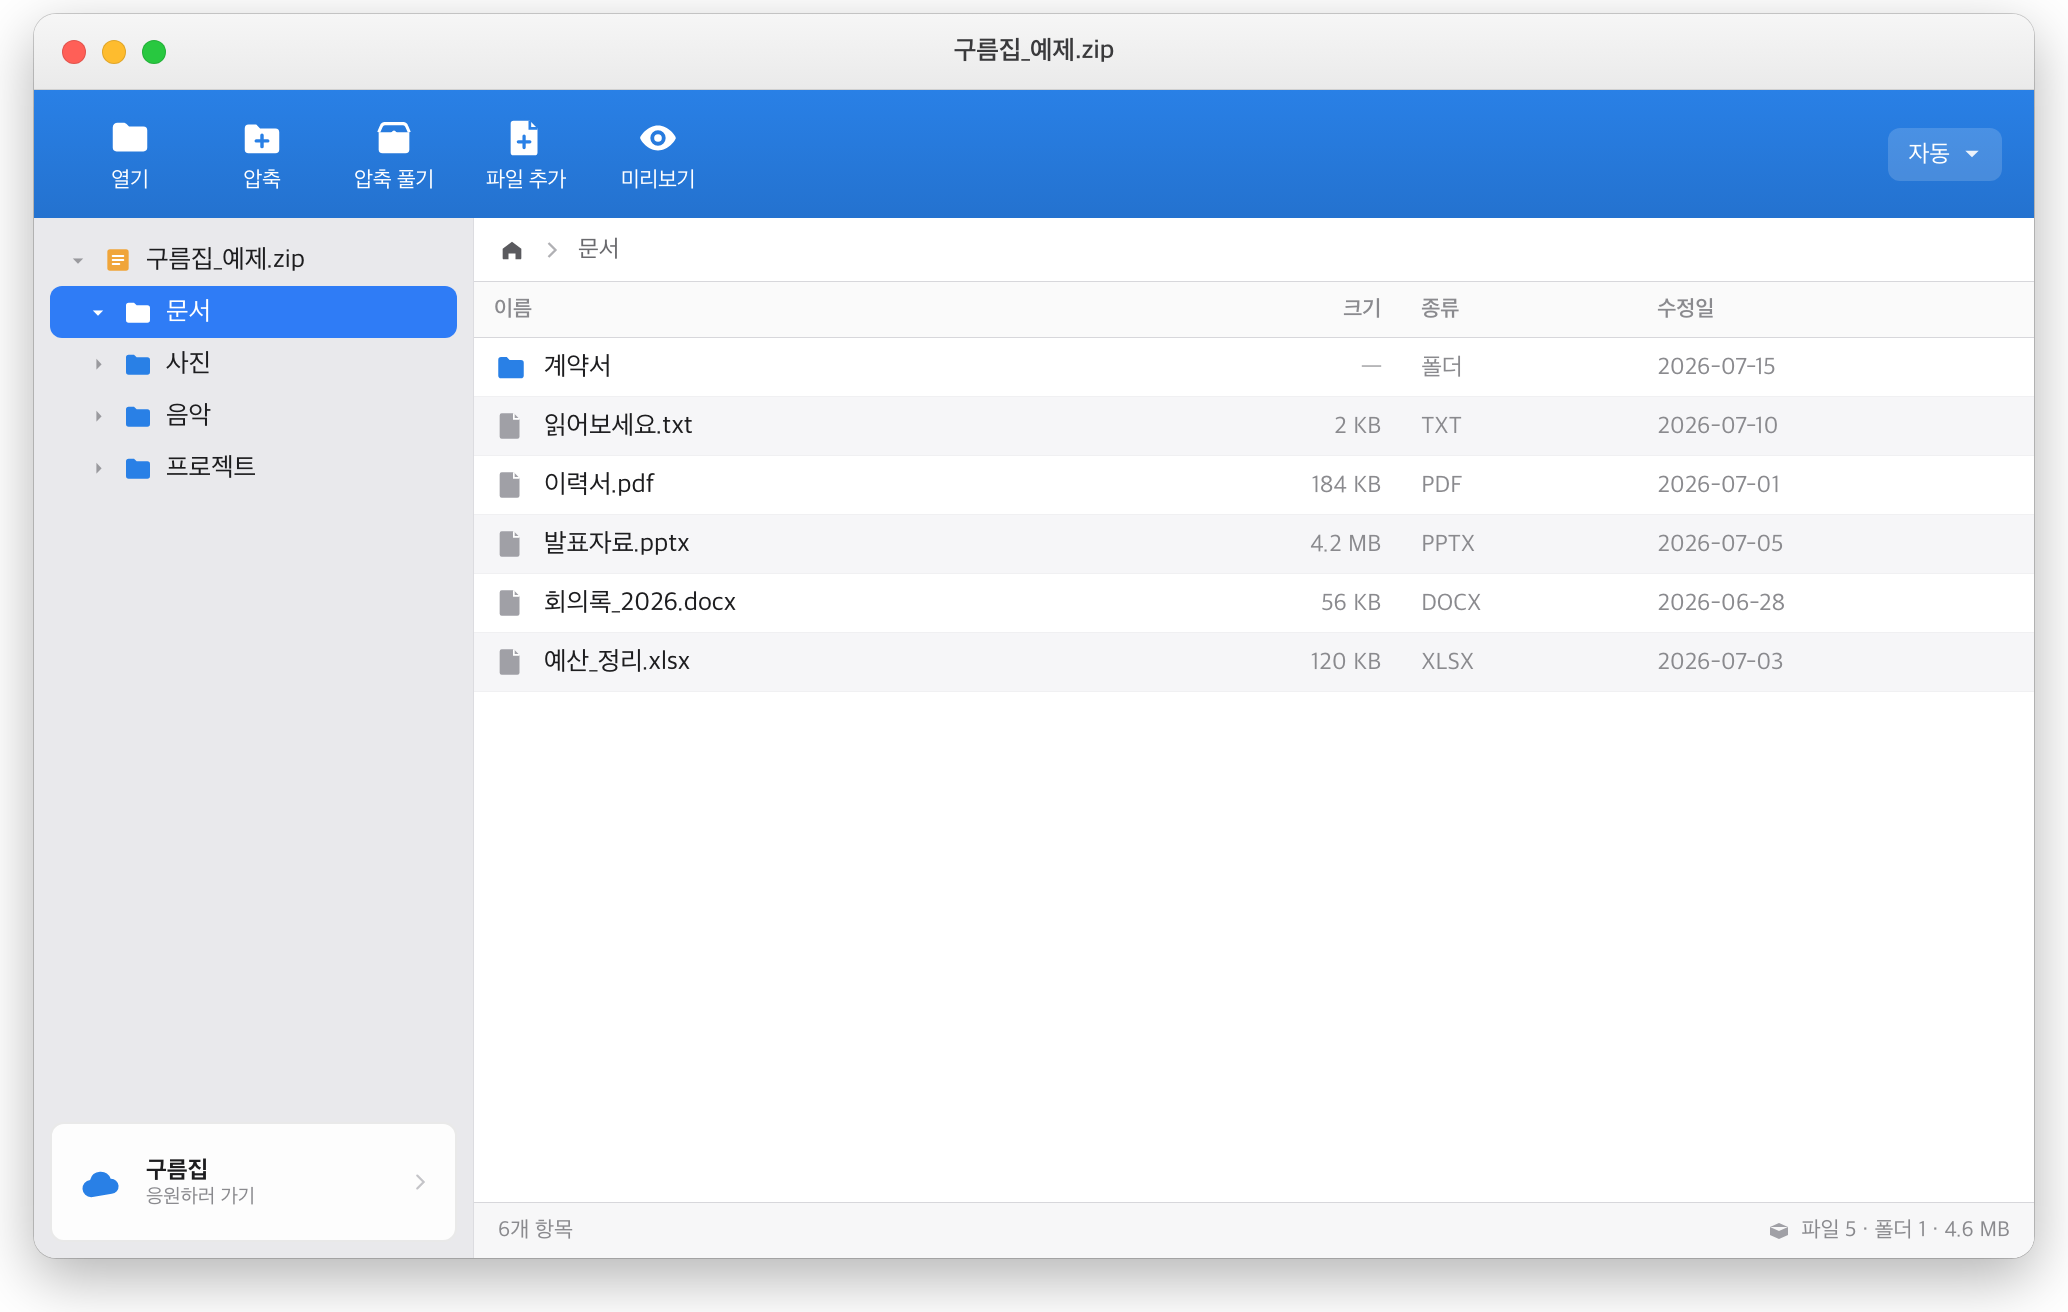
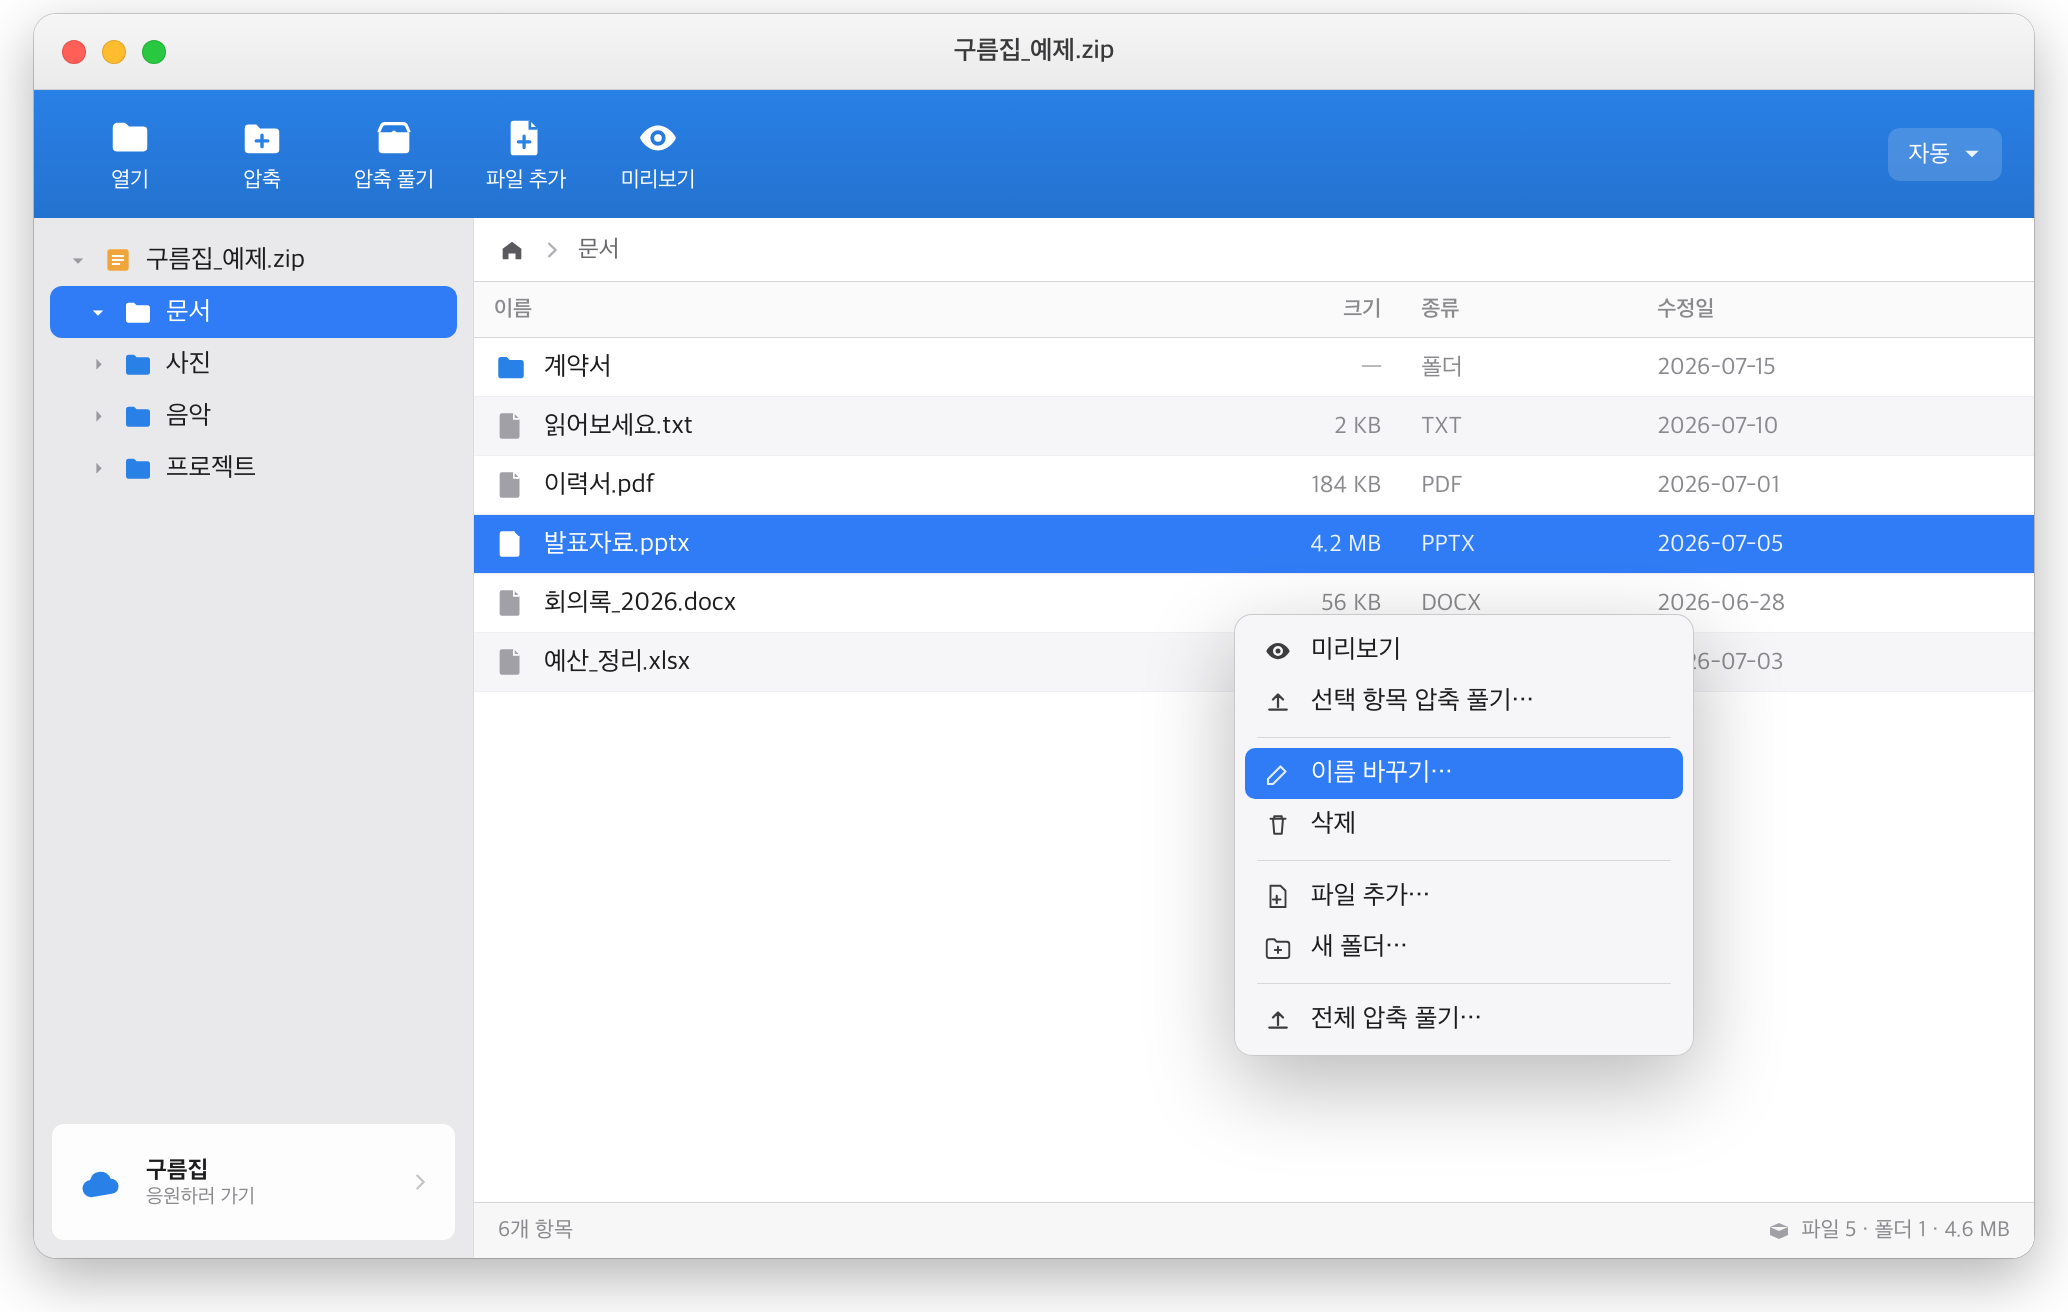
No need to fully unpack and repack — edit directly inside a ZIP.

  • Add files and folders (drag & drop onto the list)
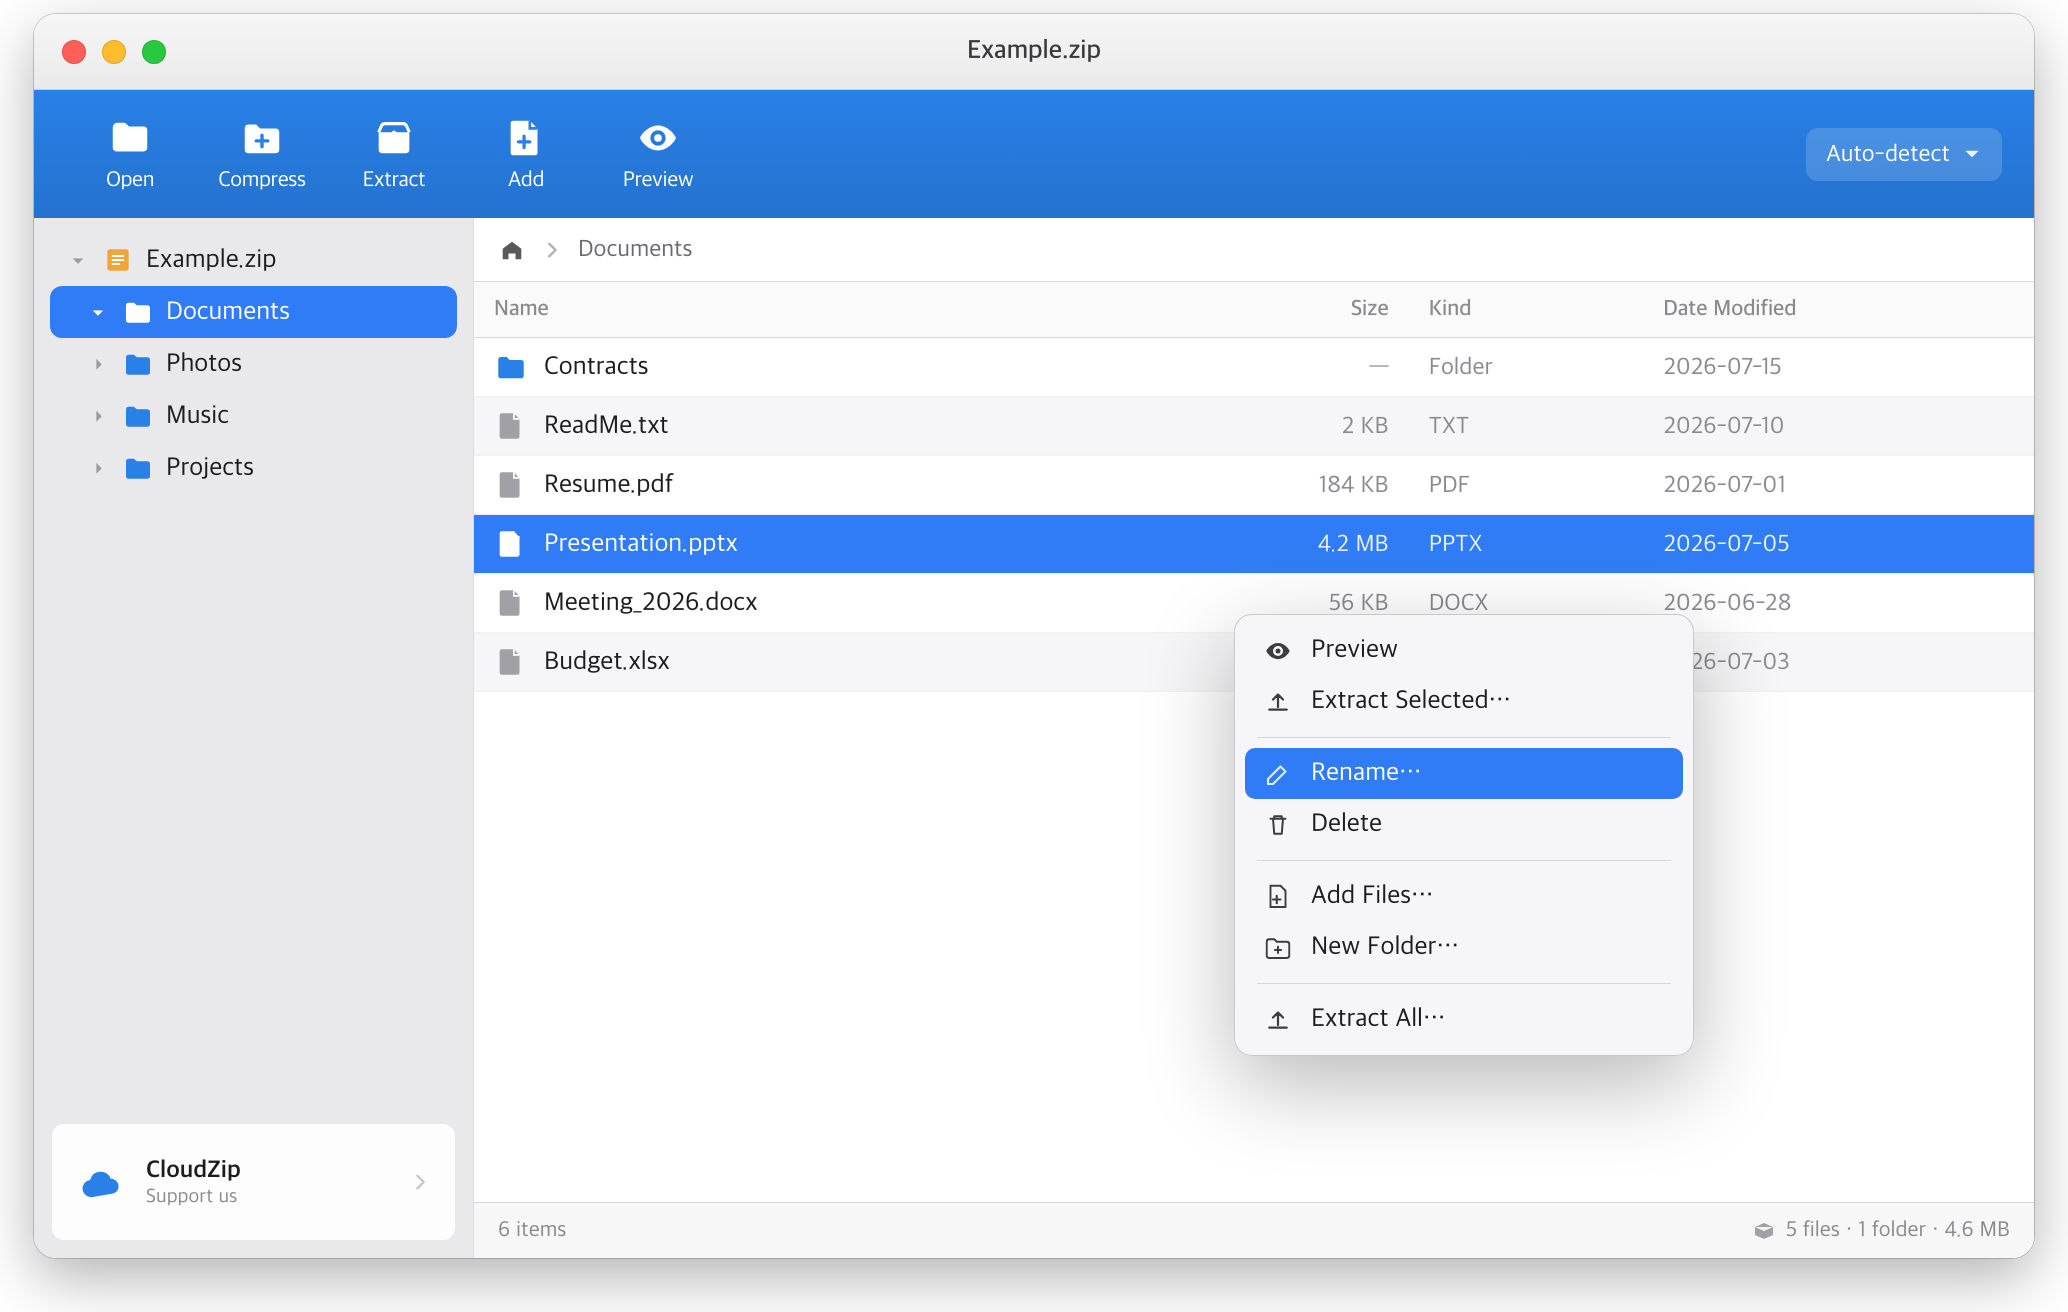
  • Delete (Delete key / right-click)
  • Rename and create a new folder
  • Move items into another folder (drag onto the folder tree on the left)

Existing compressed data is left untouched and only the changes are written, so it's extremely fast.


No More Garbled Filenames

Legacy filename encodings (CP949, Shift-JIS, GBK) are automatically detected, so CJK filenames display and extract without corruption.

Deep Finder Integration

  • Right-click → Compress / Extract right in Finder
  • Drag files out of an archive straight into Finder to extract them
  • Double-click an archive to open it in CloudZip


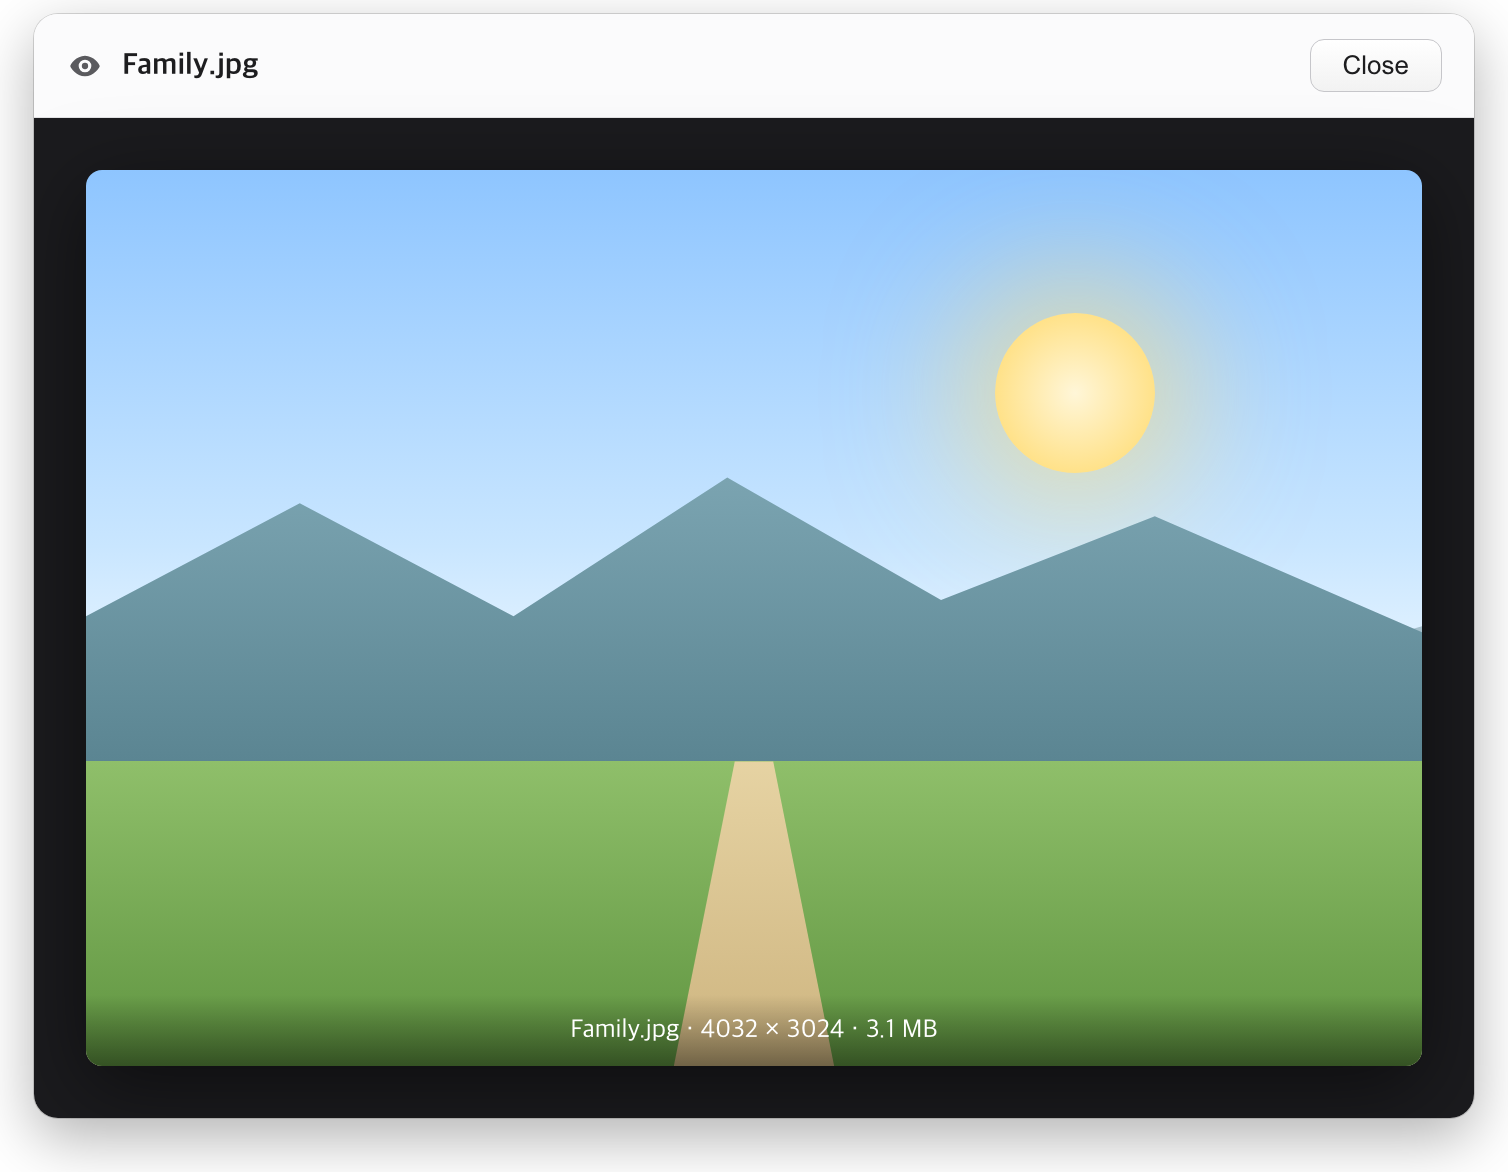
Quick Look Preview

Preview photos, documents, and more without extracting the archive.


Simple Drag & Drop

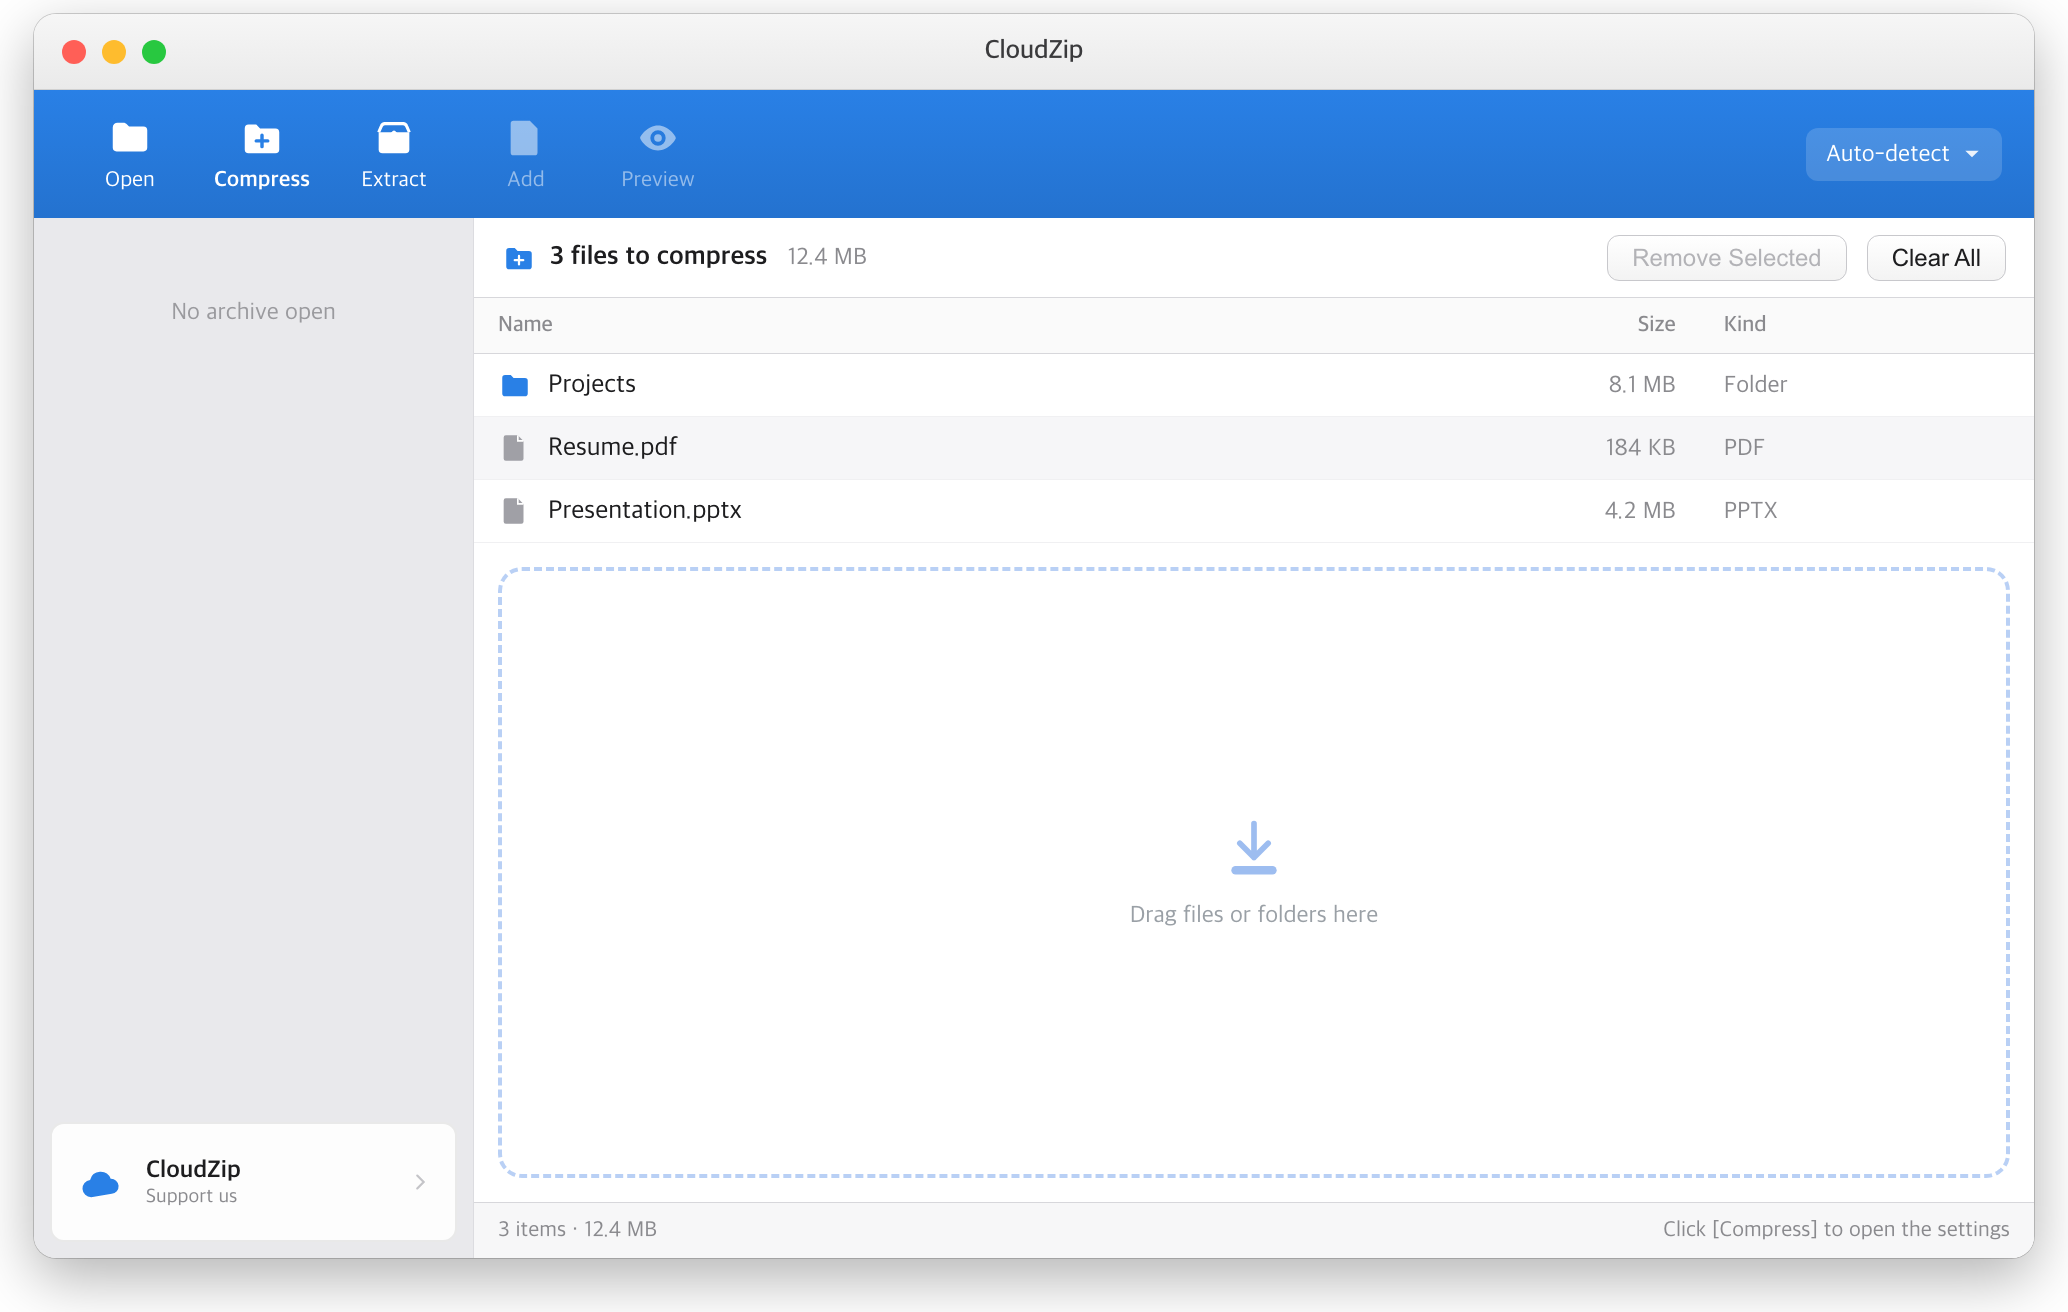
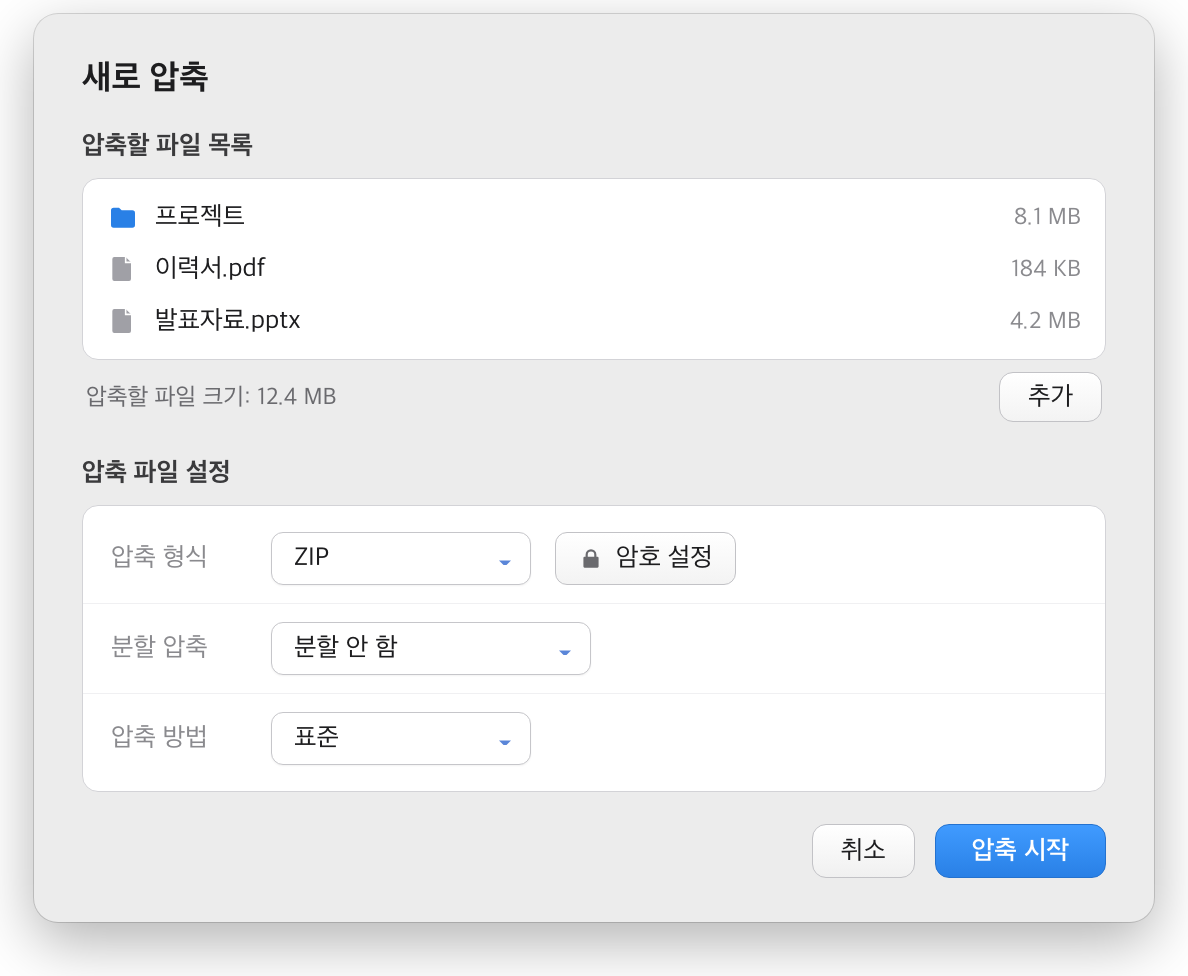
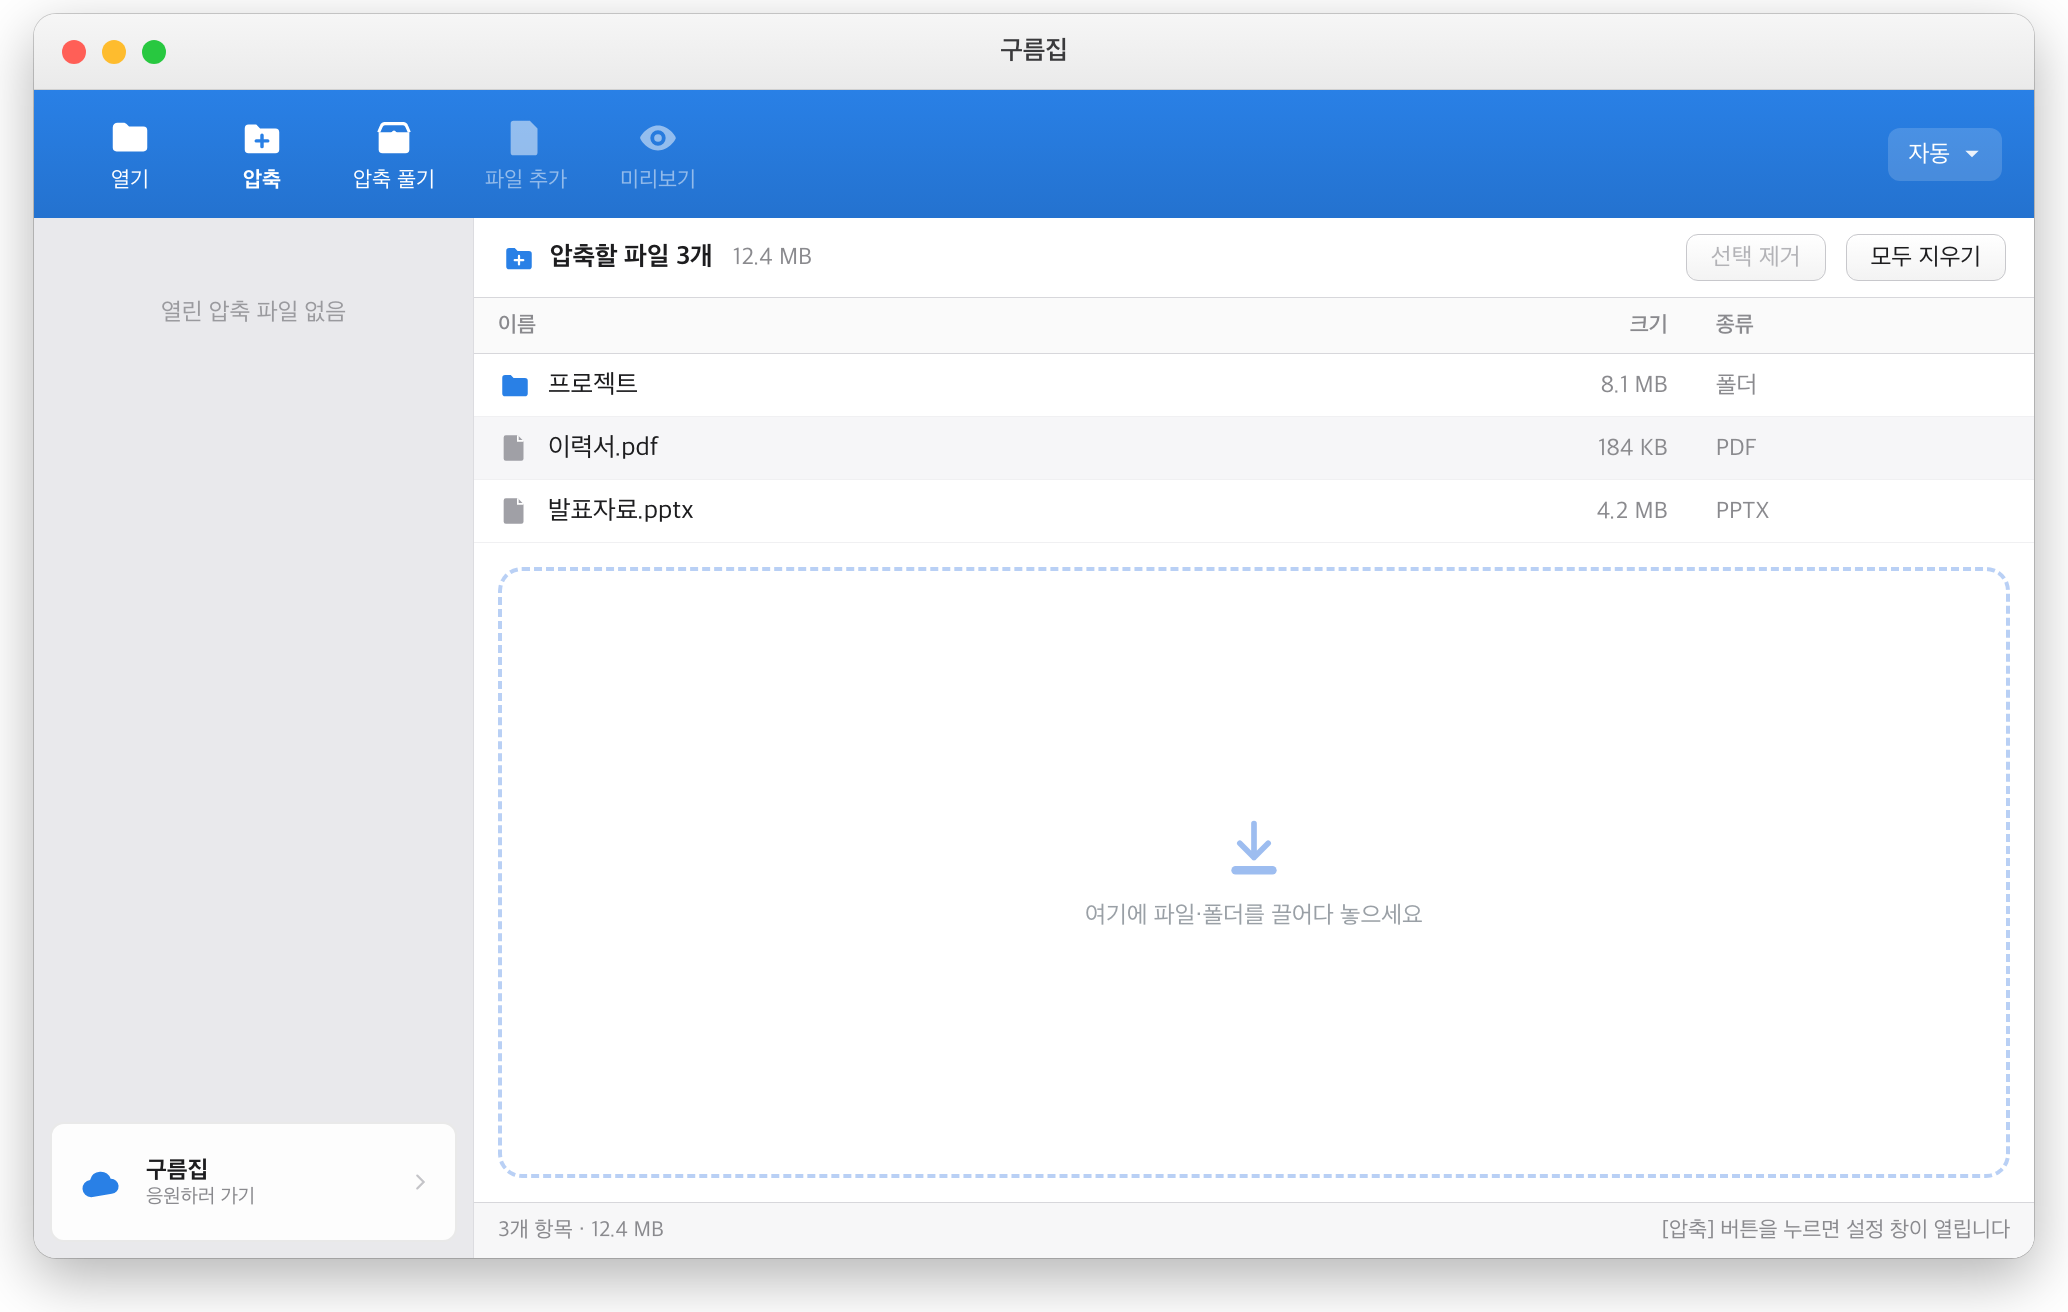
Just drag files and folders onto the window to queue them, then hit Compress.


Fine-Grained Preferences

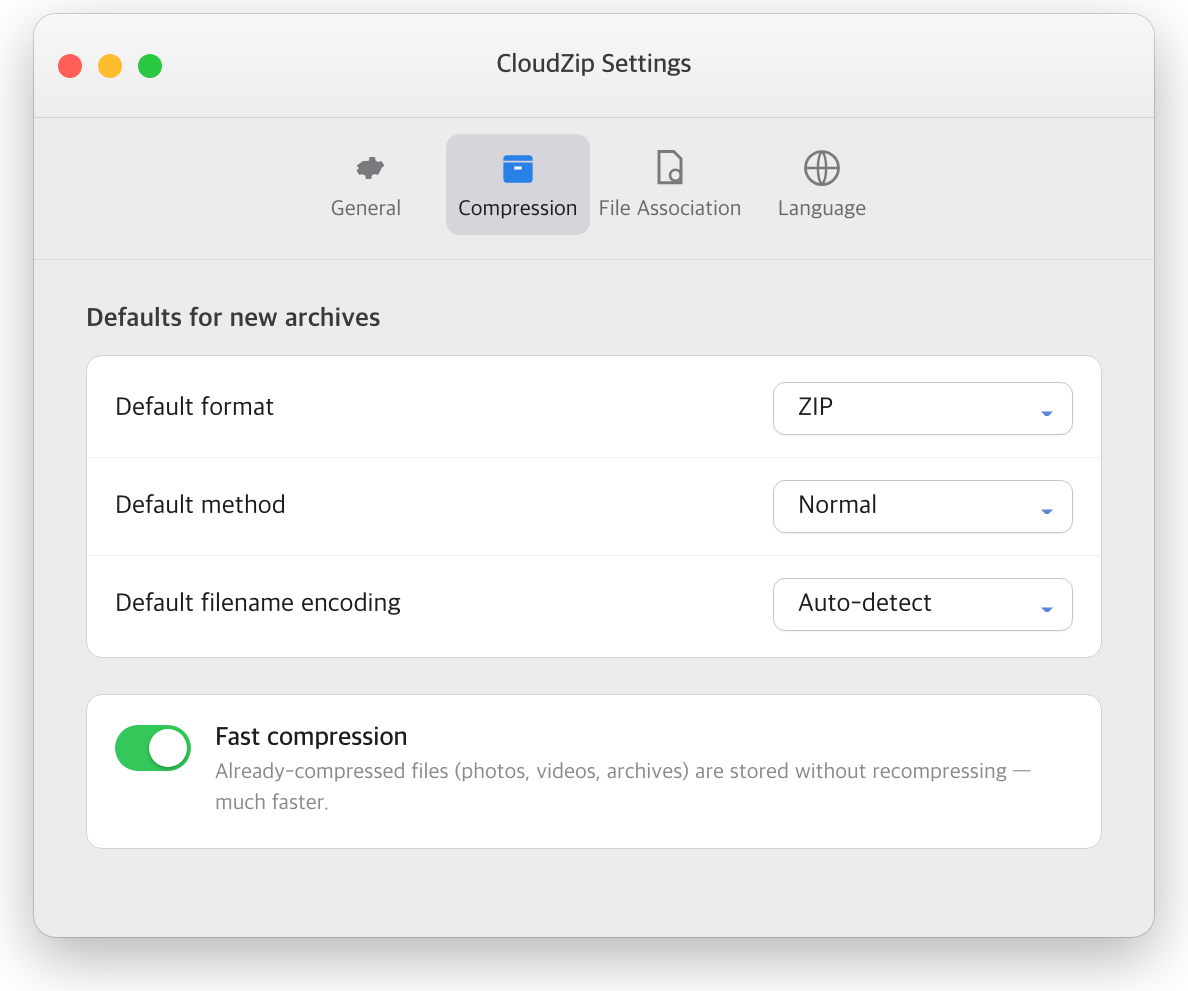
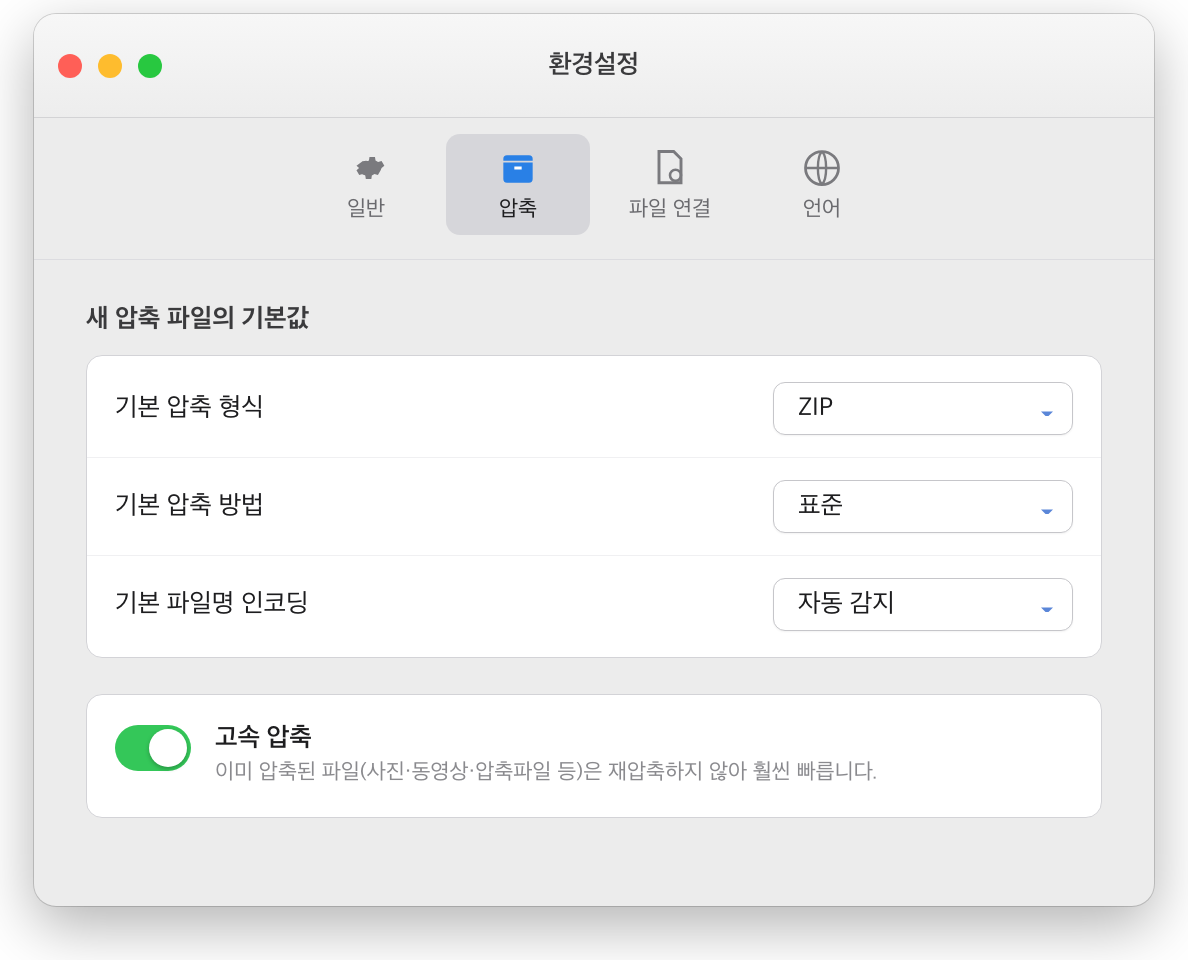
Set your default format, compression level, filename encoding, fast archiving, and file associations. Available in 5 languages: English, Korean, Japanese, Chinese (Simplified/Traditional).


Command-Line Tool

Beyond the GUI, the cloudzip terminal command can compress, extract, and list archives — great for scripts and automation.

cloudzip l archive.zip                   # list
cloudzip x archive.7z -o ./out           # extract
cloudzip c backup.tar.zst docs photos -l 9   # compress

Enable it once from the app menu: CloudZip → Install Command Line Tool…


ㅁ  System Requirements

  • macOS 13 Ventura or later
  • Universal binary — runs natively on both Apple silicon (M1 and later) and Intel Macs


ㅁ  Download & Install

On first launch macOS may show a security prompt. See the [install guide link] for step-by-step instructions.

[Download Link]

반응형

'CloudZIP' 카테고리의 다른 글

[ENG] How to Install CloudZIP on Mac  (0) 2026.07.19
구름집 설치 가이드  (0) 2026.07.19
구름집 1.0.0 배포 - 맥용 무료 압축 프로그램  (0) 2026.07.19

구름집(CloudZip) 다운로드 & 설치 가이드

구름집을 처음 설치하는 분들을 위한 안내입니다. 맥에서는 외부에서 받은 앱을 처음 열 때 보안 경고가 뜰 수 있는데, 아래 순서대로 하면 문제없이 실행됩니다.


1. 다운로드

아래 링크에서 최신 버전(1.0.0)을 내려받으세요.

 [다운로드 링크 — CloudZip-1.0.0.dmg]

  • macOS 13 Ventura 이상
  • Apple 실리콘(M1~)·인텔 맥 모두 지원 (유니버설 바이너리)


2. 설치하기

내려받은 .dmg 파일을 두 번 눌러 열고, 나타나는 구름집 아이콘을 응용 프로그램(Applications) 폴더로 끌어다 놓으면 설치가 끝납니다.


3. 처음 실행하기 (보안 경고 해제)

구름집은 개인 개발자가 배포하는 앱이라, 처음 열 때 "확인되지 않은 개발자" 또는 "열 수 없습니다" 경고가 뜰 수 있습니다. 정상이며, 아래 방법으로 한 번만 허용하면 이후로는 그냥 열립니다.

▶ 방법 1 — 우클릭으로 열기 (macOS 14 이하)

  1. 응용 프로그램 폴더에서 구름집 아이콘을 우클릭(또는 Control+클릭)
  2. 메뉴에서 [열기] 선택
  3. 경고창에서 다시 [열기] 클릭

▶ 방법 2 — 시스템 설정에서 허용 (macOS 15 Sequoia 이상)

  1. 구름집을 한 번 실행 시도 (경고가 뜨고 닫힘)
  2. 시스템 설정 → 개인정보 보호 및 보안 열기
  3. 아래로 스크롤 → "구름집이(가) 차단되었습니다" 안내의 [그래도 열기] 클릭
  4. 다시 뜨는 확인창에서 [열기]

▶ 방법 3 — "손상되어 열 수 없습니다"가 뜰 때 (터미널)

드물게 "손상되었기 때문에 열 수 없습니다" 메시지가 나오면 다운로드 격리 속성 때문입니다. 터미널(응용 프로그램 → 유틸리티 → 터미널)에서 아래를 붙여넣고

Enter

:

xattr -dr com.apple.quarantine /Applications/CloudZip.app

그런 다음 다시 실행하면 정상적으로 열립니다.


4. 파인더 우클릭 메뉴 켜기

파인더에서 우클릭 → 압축 / 압축 풀기를 쓰려면 확장 기능을 한 번 켜줘야 합니다.

  1. 구름집을 한 번 실행합니다
  2. 시스템 설정 → 일반 → 로그인 항목 및 확장 프로그램
  3. Finder 확장 프로그램에서 구름집을 켭니다(체크)

이제 파일·폴더를 우클릭하면 여기에 압축 풀기 / ‘파일명’ 폴더에 압축 풀기 / CloudZip으로 압축하기 메뉴가 나타납니다.


5. (선택) 터미널 명령 'cloudzip' 설치

터미널·스크립트에서 압축·풀기를 하고 싶다면:

  1. 구름집을 실행합니다
  2. 메뉴 구름집 → 명령줄 도구 설치… 클릭 (관리자 암호 1회)

그러면 /usr/local/bin/cloudzip 링크가 생기고, 터미널에서 바로 쓸 수 있습니다.

cloudzip -h                  # 도움말
cloudzip l 파일.zip           # 목록
cloudzip x 파일.zip -o ./out  # 풀기
cloudzip c 백업.zip 폴더 -l 9  # 압축


6. 업데이트

새 버전이 나오면 같은 방법으로 내려받아 응용 프로그램 폴더의 기존 구름집을 덮어쓰면 됩니다. (실행 중이면 먼저 종료해 주세요.)


설치 중 막히는 부분이 있으면 댓글로 남겨주세요. 

반응형

구름집(CloudZip) — 가볍고 편한 맥용 압축 프로그램

⚙️ 요구 사양 — macOS 13 Ventura 이상 · Apple 실리콘(M1~)/인텔 맥 모두 지원 (유니버설 바이너리)

맥에서 압축 파일을 다루다 보면 늘 아쉬웠습니다. 기본 압축 유틸리티는 한글 파일명이 깨지고, ZIP 말고는 제대로 못 열고, 세밀한 옵션도 없죠. 그래서 직관적이면서 맥에 딱 맞는 압축 관리자를 직접 만들었습니다. 이름은 구름집입니다.


ㅁ 지원 형식

압축 풀기(열기) — 사실상 모든 주요 형식을 지원합니다.

  • 일반: ZIP, ZIPX, 7Z, RAR, TAR, GZ(TGZ), BZ2(TBZ), XZ(TXZ), LZ, LZMA, Z, ZST
  • 디스크·설치: ISO, IMG, CAB, WIM, XAR, CPIO
  • 기타·국내: LHA/LZH, ARJ, SIT/SITX — 그리고 국내에서 많이 쓰는 EGG·ALZ

압축(만들기)

  • ZIP, 7Z, TAR, TAR.GZ, TAR.BZ2, TAR.XZ, TAR.ZST
  • ZIP은 암호 설정(암호화 ZIP)분할 압축도 지원


ㅁ 주요 기능

빠르고 강력한 압축

  • 멀티코어 병렬 압축으로 빠른 속도
  • 고속 압축 — 이미 압축된 파일(사진·영상·PDF 등)은 다시 압축하지 않고 담아 시간을 크게 절약
  • 암호(암호화 ZIP)분할 압축(10MB·100MB·700MB·1GB·4GB) 지원


압축 해제 없이 ZIP 수정

압축을 통째로 풀었다 다시 압축할 필요 없이, ZIP 안에서 바로 편집합니다.

  • 파일·폴더 추가 (목록에 드래그&드롭)
  • 삭제 (Delete 키 / 우클릭)
  • 이름 바꾸기, 새 폴더 만들기
  • 파일을 다른 폴더로 이동 (왼쪽 폴더 트리로 끌어다 놓기)

기존 압축 데이터를 그대로 두고 바뀐 부분만 처리하기 때문에 매우 빠릅니다.


한글 파일명 안 깨짐

구형 압축 파일의 CP949(EUC-KR) 한글 이름은 물론 일본어·중국어 인코딩까지 자동으로 인식해 깨짐 없이 보여주고 풀어줍니다.

Finder(파인더)와 완벽 통합

  • 파인더에서 우클릭 → 압축 / 압축 풀기
  • 압축 파일 안의 파일을 파인더로 바로 끌어내 꺼내기
  • 파일을 더블클릭하면 구름집으로 열기


미리보기 (Quick Look)

압축을 풀지 않고도 사진·문서 등 파일 내용을 바로 미리보기할 수 있습니다.


드래그 & 드롭으로 간편하게

파일·폴더를 창에 끌어다 놓기만 하면 압축 대기 목록에 담기고, [압축] 버튼으로 바로 압축됩니다.


세밀한 환경설정

기본 압축 형식·압축률·파일명 인코딩, 고속 압축, 파일 연결까지 원하는 대로 설정할 수 있습니다. 그리고 한국어·영어·일본어·중국어(간체/번체) 5개 언어를 지원합니다.


명령줄(터미널)에서도 사용

GUI뿐 아니라 터미널 명령 cloudzip으로도 압축·풀기·목록을 처리할 수 있어 스크립트·자동화에 활용하기 좋습니다.

cloudzip l archive.zip                    # 목록
cloudzip x archive.7z -o ./out            # 풀기
cloudzip c backup.tar.zst 문서 사진 -l 9   # 압축

앱 메뉴 구름집 → 명령줄 도구 설치…를 한 번 누르면 활성화됩니다.


ㅁ 지원 환경

  • macOS 13 Ventura 이상
  • Apple 실리콘(M1~)·인텔 맥 모두 지원 (유니버설 바이너리)


ㅁ 다운로드 & 설치

처음 실행할 때 보안 경고가 뜰 수 있습니다. 자세한 설치 방법은 [설치 가이드 글 링크]를 참고하세요.

CloudZip-1.0.0.dmg
9.02MB

반응형

'CloudZIP' 카테고리의 다른 글

[ENG] How to Install CloudZIP on Mac  (0) 2026.07.19
[ENG] CloudZIP 1.0.0 - Zip,Unzip & Extract Archives on Mac  (0) 2026.07.19
구름집 설치 가이드  (0) 2026.07.19

+ Recent posts